
Ok - so I promised a little play by play of how we accomplished the Book Nook in our new room, which we have now labelled the "study". Sounds all professional doesn't it? :) Well, here's the tutorial. I know I found a lot of these things helpful when we re-did the room, so I thought I'd share our own experiences and what worked in case anyone else is interested. Soooo...here goes!
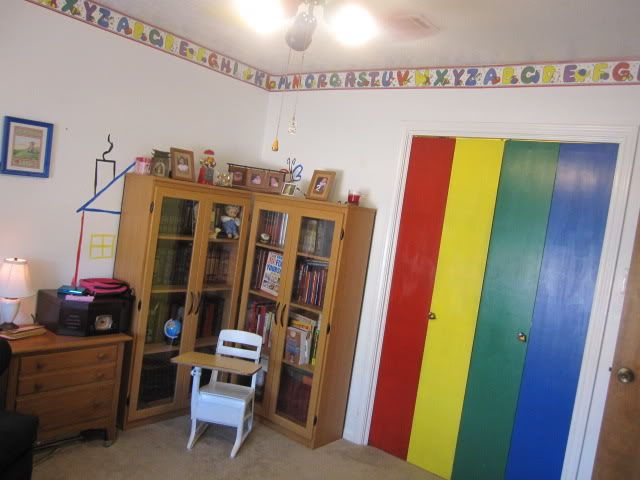
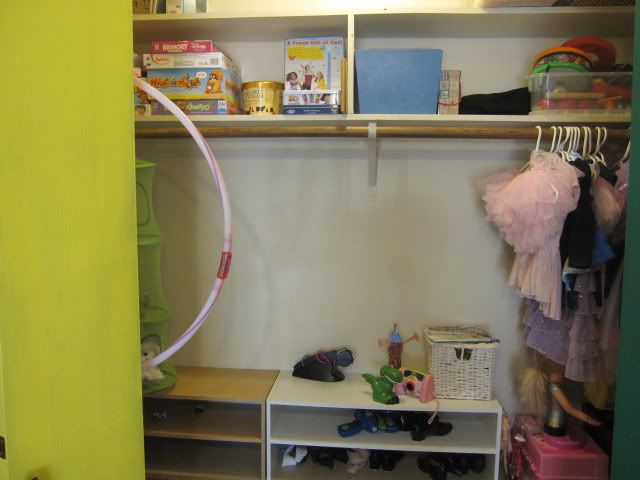
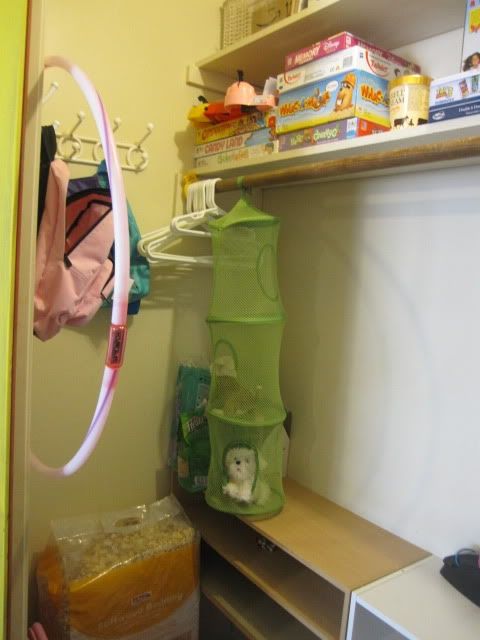
Ok, first came stripping the closet. Before I get there, here's the before picture of the closet (and I know a lot of this is repeat pictures, but if you are only looking at this post, it might be helpful)...of course, only AFTER I ditched a LOT of toys and such. Seriously, this was after I got rid of stuff. (in the first pic you are looking at the closet doors - the rainbow)

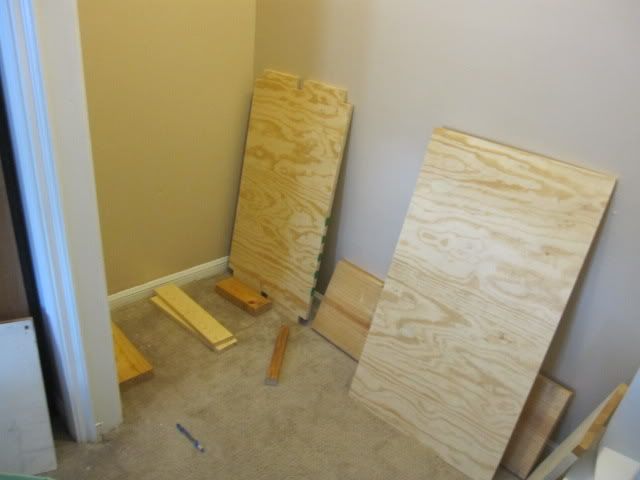
Then I stripped it. I mean, stripping it of shelves, rods, doors, and hooks. Then I had to decide on a paint color (for the whole room eventually). We painted (or, I painted really). We bought a small desk and put it together, only to realize it was still really too big to go in there and do what else we wanted to do in there. So we decided we were going to save the desk for the actual room (not the closet or book nook). So then Brad got to building the first step of this project. The bench seat.
We went through lots of tutorials and ideas on exactly how we wanted to do this and it was relatively simple once we agreed on a plan. And since I knew those were helpful to me, I tried to remember to take lots of pictures of our process with the idea I'd do my own tutorial (assuming it turned out good- haha!)
First, the empty space after I painted (and the color is maybe a little bit darker in real life? And not so yellowish? The picture distorts the color a tad, but it is a definite khaki in person)...
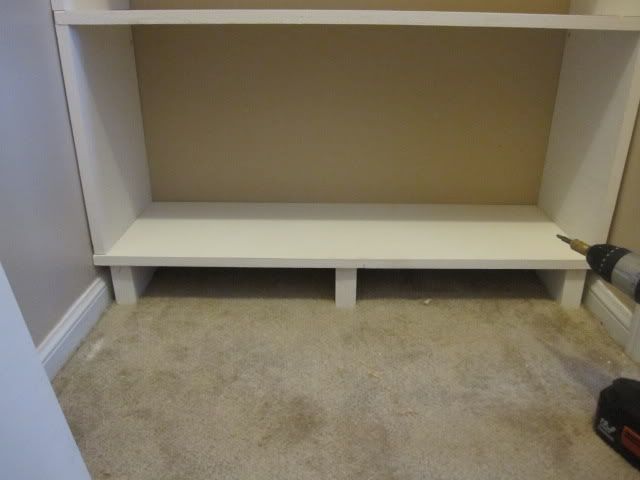
Then he built the bottom frame. Our space was 20in deep and 35.5in wide to bring it right next to the door frame, which we decided was perfect size for being nice and comfy when you sit. What the picture below might not show is that there is a support of 2x4s underneath the plywood base.

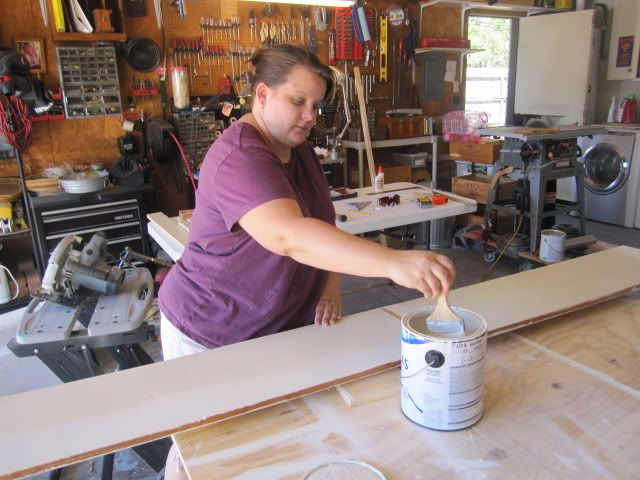
Next we painted the frame white...I am going with khaki colored walls, white desk, shelves, bench and black trim (to match a oversized fold out chair in the room). And again, I was the painter in all this. Seriously...so sick of painting. you'll see what I mean later. But every little piece had to be painted. We didn't want to spend the extra for prepainted wood. Ok, maybe I did. But whatever. :P

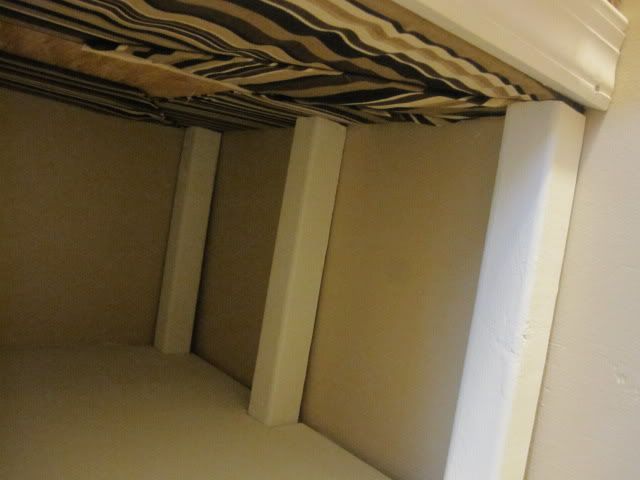
Then, we went back and forth on what kind of support the bench should have. Brad considered doing a frame with 2x4's, but we thought that would raise the bench up to an uncomfortable seating height and we definitely wanted a specific room of space underneath the bench (so we couldn't just make it lower) to allow for under the bench storage. So we settled on a piece of plywood, with a support system (the supports underneath on the sides and in the middle), especially since I knew I wanted a divider in the middle for looks and for those storage purposes. So the middle framing went up.
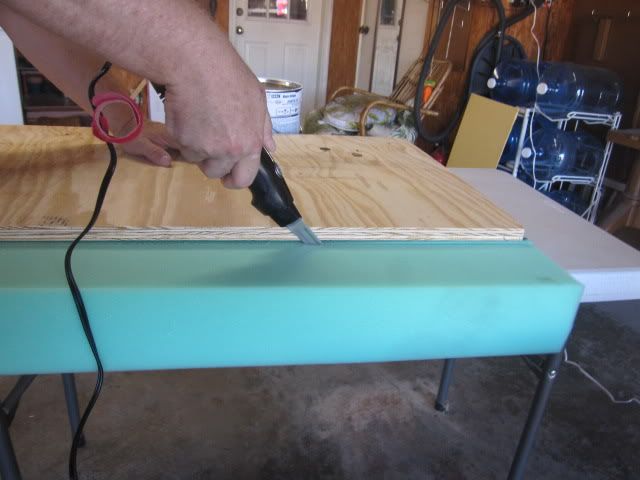
Then the plywood would rest right on that. Literally, it was just resting on that. We would build the cushion and basically snap it in, for lack of a better phrase. The snug fit would help with the support and by it resting on the frame, it would work perfectly. So, next up was making the cushion part. I wanted a nice comfy bench. I wanted it soft and squishy, so we went with 4 inch foam, placing it on top of a cut piece of plywood that was the exact 20in x 35.5in of the space, then wrapping the fabric I picked out around it, stapling it to the underneath.
Sounds easy, but it was pretty tricky. First, there was cutting the foam. Tip: Use an electric knife, like you would cut a turkey. Learned that from the cutter at JoAnn's...best idea ever. Worked like a charm and was super easy.
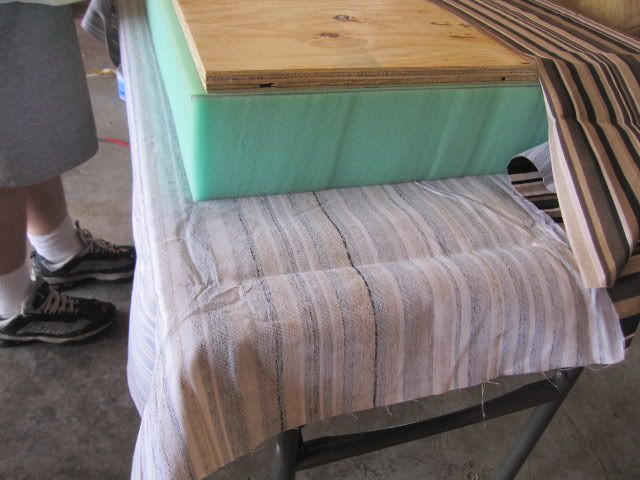
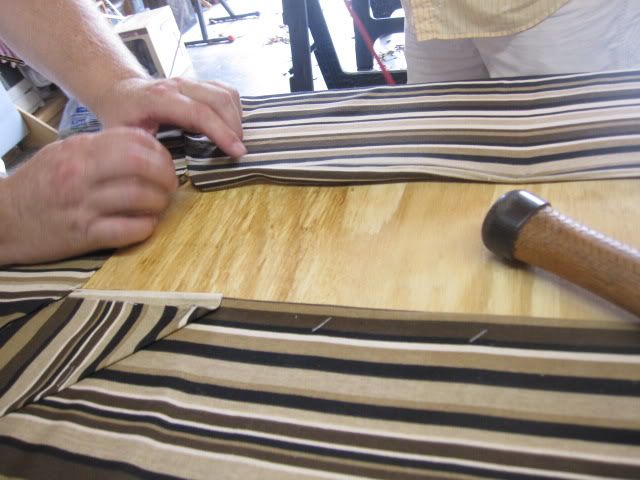
Next trick was getting the fabric tight enough. I've come to realize there is always going to be some give, but we wanted it as tight as possible to limit tearing and such. So I think we did ok. My dad happened to be here that day and helped with pulling it around tight and stapling it. Also, the folding on the edges were tricky to get placed evenly, but since you can't see the sides, we let those be the ugly sides. ;) You'll also notice we purposely cut the foam to where it was slightly over the edge of the plywood. We had a theory and tested the theory first before stapling and making it 'permanent'. And we were right. Basically, if you don't have a little overhang, then you end up sitting on the edge of the wood (that would eventually be trim) and it hurts! So we left the edge of no more than a 1/4-1/2 inch. It also helped make a snug fit when we wrapped the fabric around tightly.
Then we dropped the seat in and voila! Beautiful! Right?

You can still see the support underneath here. Its not screwed in or bolted down or anything...literally just pushed, wedged, resting on top of the supports. However, it is VERY sturdy and I feel totally 100% comfortable with this design. It also makes it easy if we ever need or want to take the bench out? For replacing the fabric or whatever. Just pop off the trim and pull it out!
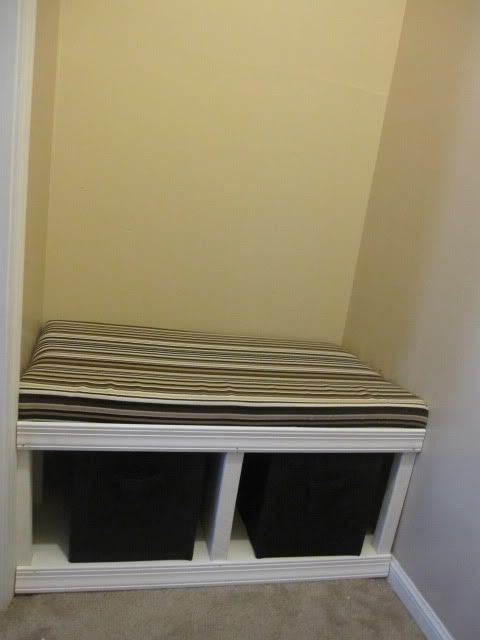
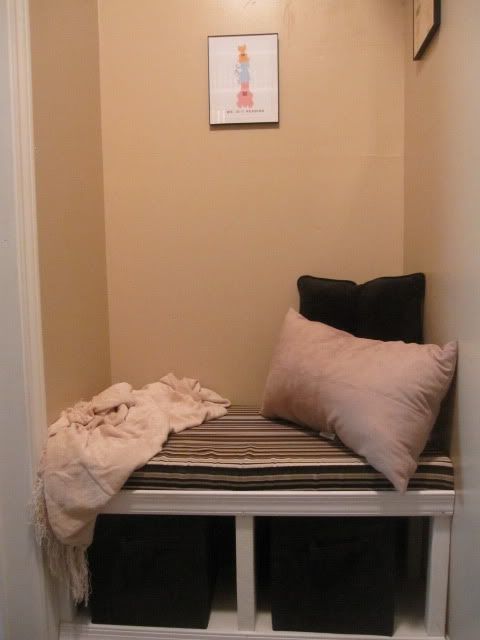
We added trim to the bottom and tops to make it look a little nicer and fabric boxes for storage and we have a bench seat! Next I added a decorative pillow and a throw blanket for that perfect reading environment.
Next were the bookshelves. This was all Brad, his plan, his ideas, his technique, everything. So I will only show you the process and let you know that I, again, was the one painting every. single. part. of this. Ugh... my hand is permanently fixed in the shape of holding a paintbrush I think. :(
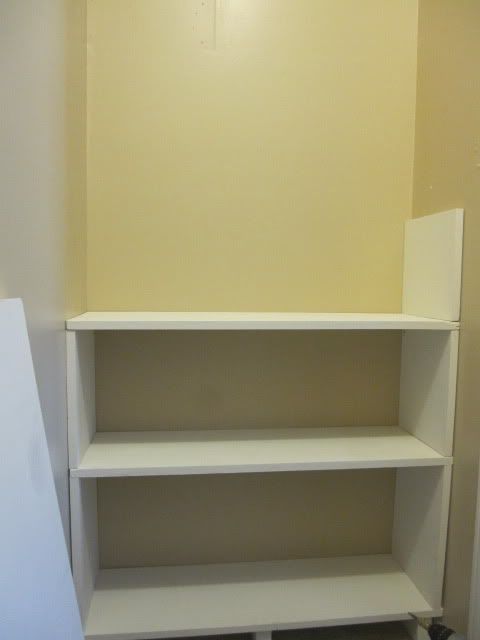
It also turned out nicely I think! The bottom couple of shelves are all the kids' books and the rest are mostly Brad's books to the top - the Harvard Classics, all his literary books...you know, the expensive stuff. :)

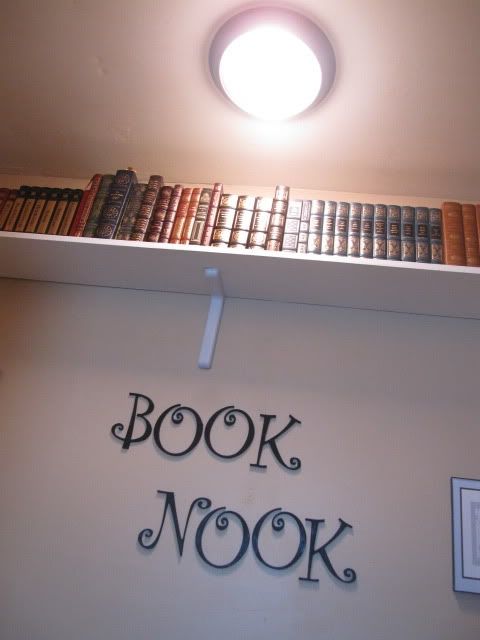
I also wanted to add a shelf around the top of the whole nook. Originally it was going to be for storing what I took out of the closet (games, the few toys and stuff) that I did keep. All the stuff that you saw left over in the first pictures in this post. However, one day, after sorting and organizing and putting away, I found new homes (as in new places in our house, not giving away) for all of these items - most everything went in the girls' bedroom and/or their closet. So this extra shelf allowed Brad more room for more books, which I think makes the whole room look nicer anyway...than a bunch of rubbermaid tubs or games would look like. :)
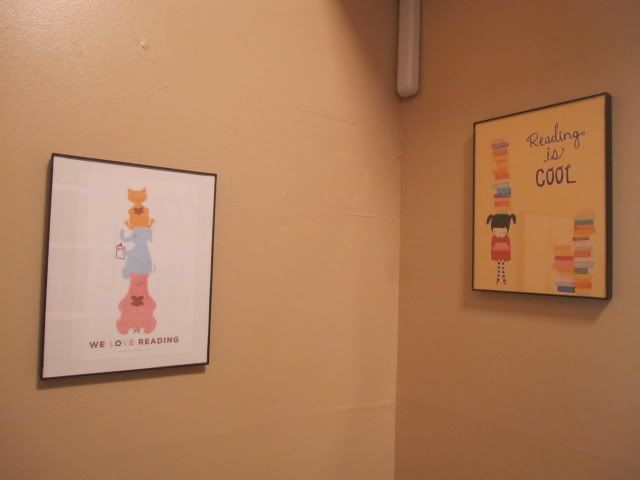
Then the final touches! I printed out these signs on nice cardstock paper and framed them...
I bought these wooden letters....and again, painted them! LOL

We added the light fixture to make it look more like an independent room...not just a closet. And you can also see that top shelf I mentioned in this picture below.
And the nook was done! I love, love, LOVE how it turned out! :)


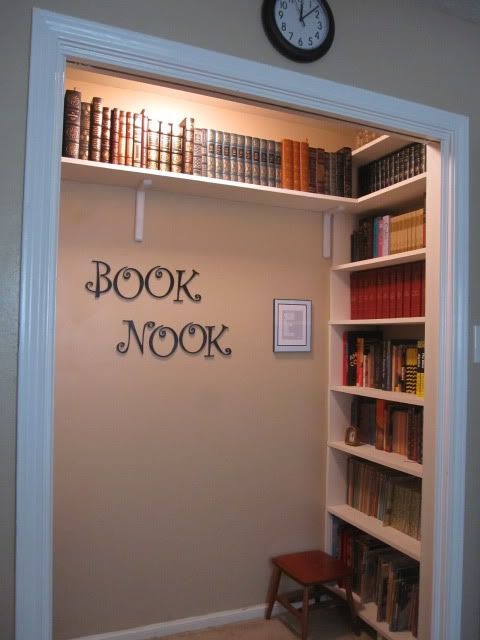
And I think the whole room and nook came together nicely! I love it soooo much. Now, Brooke (and all of us) have a nice little library and reading room to sit in and enjoy!


2 comments:
Love it!!!!!!
Love it!!!!
Post a Comment